pre-sales consultations in the chat
1-6 PM (GMT+3)


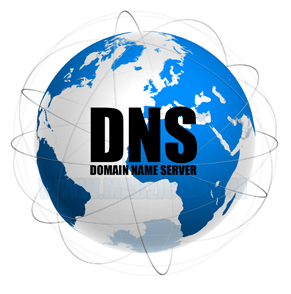
Domain Check:

pre-sales consultations in the chat
1-6 PM (GMT+3)
Domain Check:
So, you have decided to create a full-fledged Internet resource, you’ve bought disk space (server) and the domain. Perhaps you have already downloaded the content management system and are trying to install it. Before you install the CMS and create your first pages, you will have to perform one more action - to link the domain name to the hosting. You will need to do this even if you are buying a domain and disk space from the same company..
Seems counterintuitive?

If you have already tried yourself as a webmaster and created a blog or a simple business card site using website builders, there was no necessity to link a domain: you just thought about what name do you want, used it during registration, then you were creating pages, and the resource was immediately displayed in the browser. You have received a third-level domain at your disposal (example: site.netlify.app - "blog name.main domain name.domain zone"). When you will be developing a regular resource that will be hosted on some server, you will need a second-level domain name (site.com - "website name.domain zone"). The registrar initially does not know where you will use the name, therefore, you’ll need to notify it by providing the DNS server data.

1. Find and open E-Mail message with registration credentials that were sent by the hosting provider. Then copy the addresses of the DNS-server. If there’s no such data in the message or if the message was lost – look for this info on your personal account page, or just write to technical support
2. Go to your personal account page on the website, where you have registered the second-level domain. Find there fields with DNS-addresses or the "Delegation/linking/binding" menu item. Those fields may be automatically filled with the registrar’s addresses (in this case the company’s advertising page will be opened by default). You need to delete these addresses.
3. Paste your hosting-provider’s DNS-addresses in corresponding fields. Press "Save", if there is such button.
4. Go to the server, enter the chosen domain, and now you can create the website.
The resource won’t be displayed for twenty-four hours: instead of the CMS control panel you will see a blank page.
Many hosting companies offer domain name registration as an additional service. If you are ordering the domain and hosting at one place, there could be no need to enter data about the DNS-server. It will be much simpler:
On the provider’s site you create an account and order web-hosting (disk space).
Choose the name and make payment for it..
Wait for 24 hours
There are no additional actions required. The provider will link the domain by itself, you only need to wait for a worldwide DNS update.
If you have bought the domain name at richhost.eu, but decided to place your website at another hosting, you need to follow steps that are described above: find DNS-server addresses in the hoster’s message, go to richhost.eu and enter that data to corresponding fields.
In this case you’ll need to follow almost the same scheme:
1. Go to hoster’s website or open the message that provider sent when you have ordered disk space. Find there DNS-addresses and copy them.
2. Go to your personal account at the website of a company that is registering domain names. There you need to open the "Delegation/linking/binding" menu item. Enter addresses and save.
3. Wait while the data will be updated.
At first you can enter data of any server that you use for hosting html-files: physical or virtual, your own or rented, situated in your country or abroad. There is also no complexity to link a domain to VPS or VDS-server, you just have to find DNS-addresses. But it may cause some difficulties for beginner users. If you don’t have DNS-addresses (weren’t sent or are lost), simply write to technical support: company’s employees will give you data that you’ll be able to enter on the registrar’s website.
When you create a web-page or when you want to link a domain to another hosting (that means that you are moving your resource to a different server), you need to enter new DNS-addresses. DNS-servers allow hoster to request your domain name and to open your website.
If you don’t fill in DNS data on the registrar’s website, the resource will not be displayed. Web-hoster simply will not “understand” that he serves pages corresponding to the chosen name. If you just enter your domain name in the database it won’t do anything: hoster does not have rights to access that domain.
Every hoster has its own DNS-addresses. Here’s how they look like:
Fill in both addresses. If there are more addresses, fill in all of them if the registrar has enough fields. This is important: both hoster and registrar use all available addresses.
In the website builder you just have to choose the name and to spend few minutes to create a “skeleton” of the resource, and then you can open it in a browser. But if you are using registrar services and rent a server, this is more complicated. The page would not be able to display in a minute, and it doesn’t matter if you are using CMS or there are just few html-pages. You will see a blank page or a title like "web server is not found". The resource will be available only after 24 hours. Before linking IP-address to the domain, take into account the delay. If you are in hurry - create html-files on your local web-server, and then deploy ready pages to the hosting.
When you choose the domain name and link it to your hosting, it affects the whole internet. It sounds pompous, but formally this is the case: you are adding new DNS-адреса addresses, and they have to be saved by all world servers. Or your web-page will remain inaccessible for users.
You don’t need to wait for a long time and to do anything more: everything will happen automatically. DNS-addresses are updated once a day. In 24 hours or less your website will be available. After that happens you can upload a CMS (if it was not done in advance), then log in into the website’s control panel and create your first pages. DNS-addresses will be saved by the registrar. You will have to change them only if you are moving from one hoster to another, and if you change server or IP-address.